Sea Scouts Uniform & Badge Guide
Our uniform represents our shared identity and achievements. Uniform consists of a Blue short sleeve shirt, navy shorts (no sports shorts), and black school shoes.
Once your child is invested, they will receive their own group scarf, woggle, and initial set of badges.
Please wash brand new shirts first before sewing any badges on. New fabric is prone to slight shrinking during its initial wash, which can distort or pucker your badges if they are attached beforehand.
🏷️ Badge Placement Examples
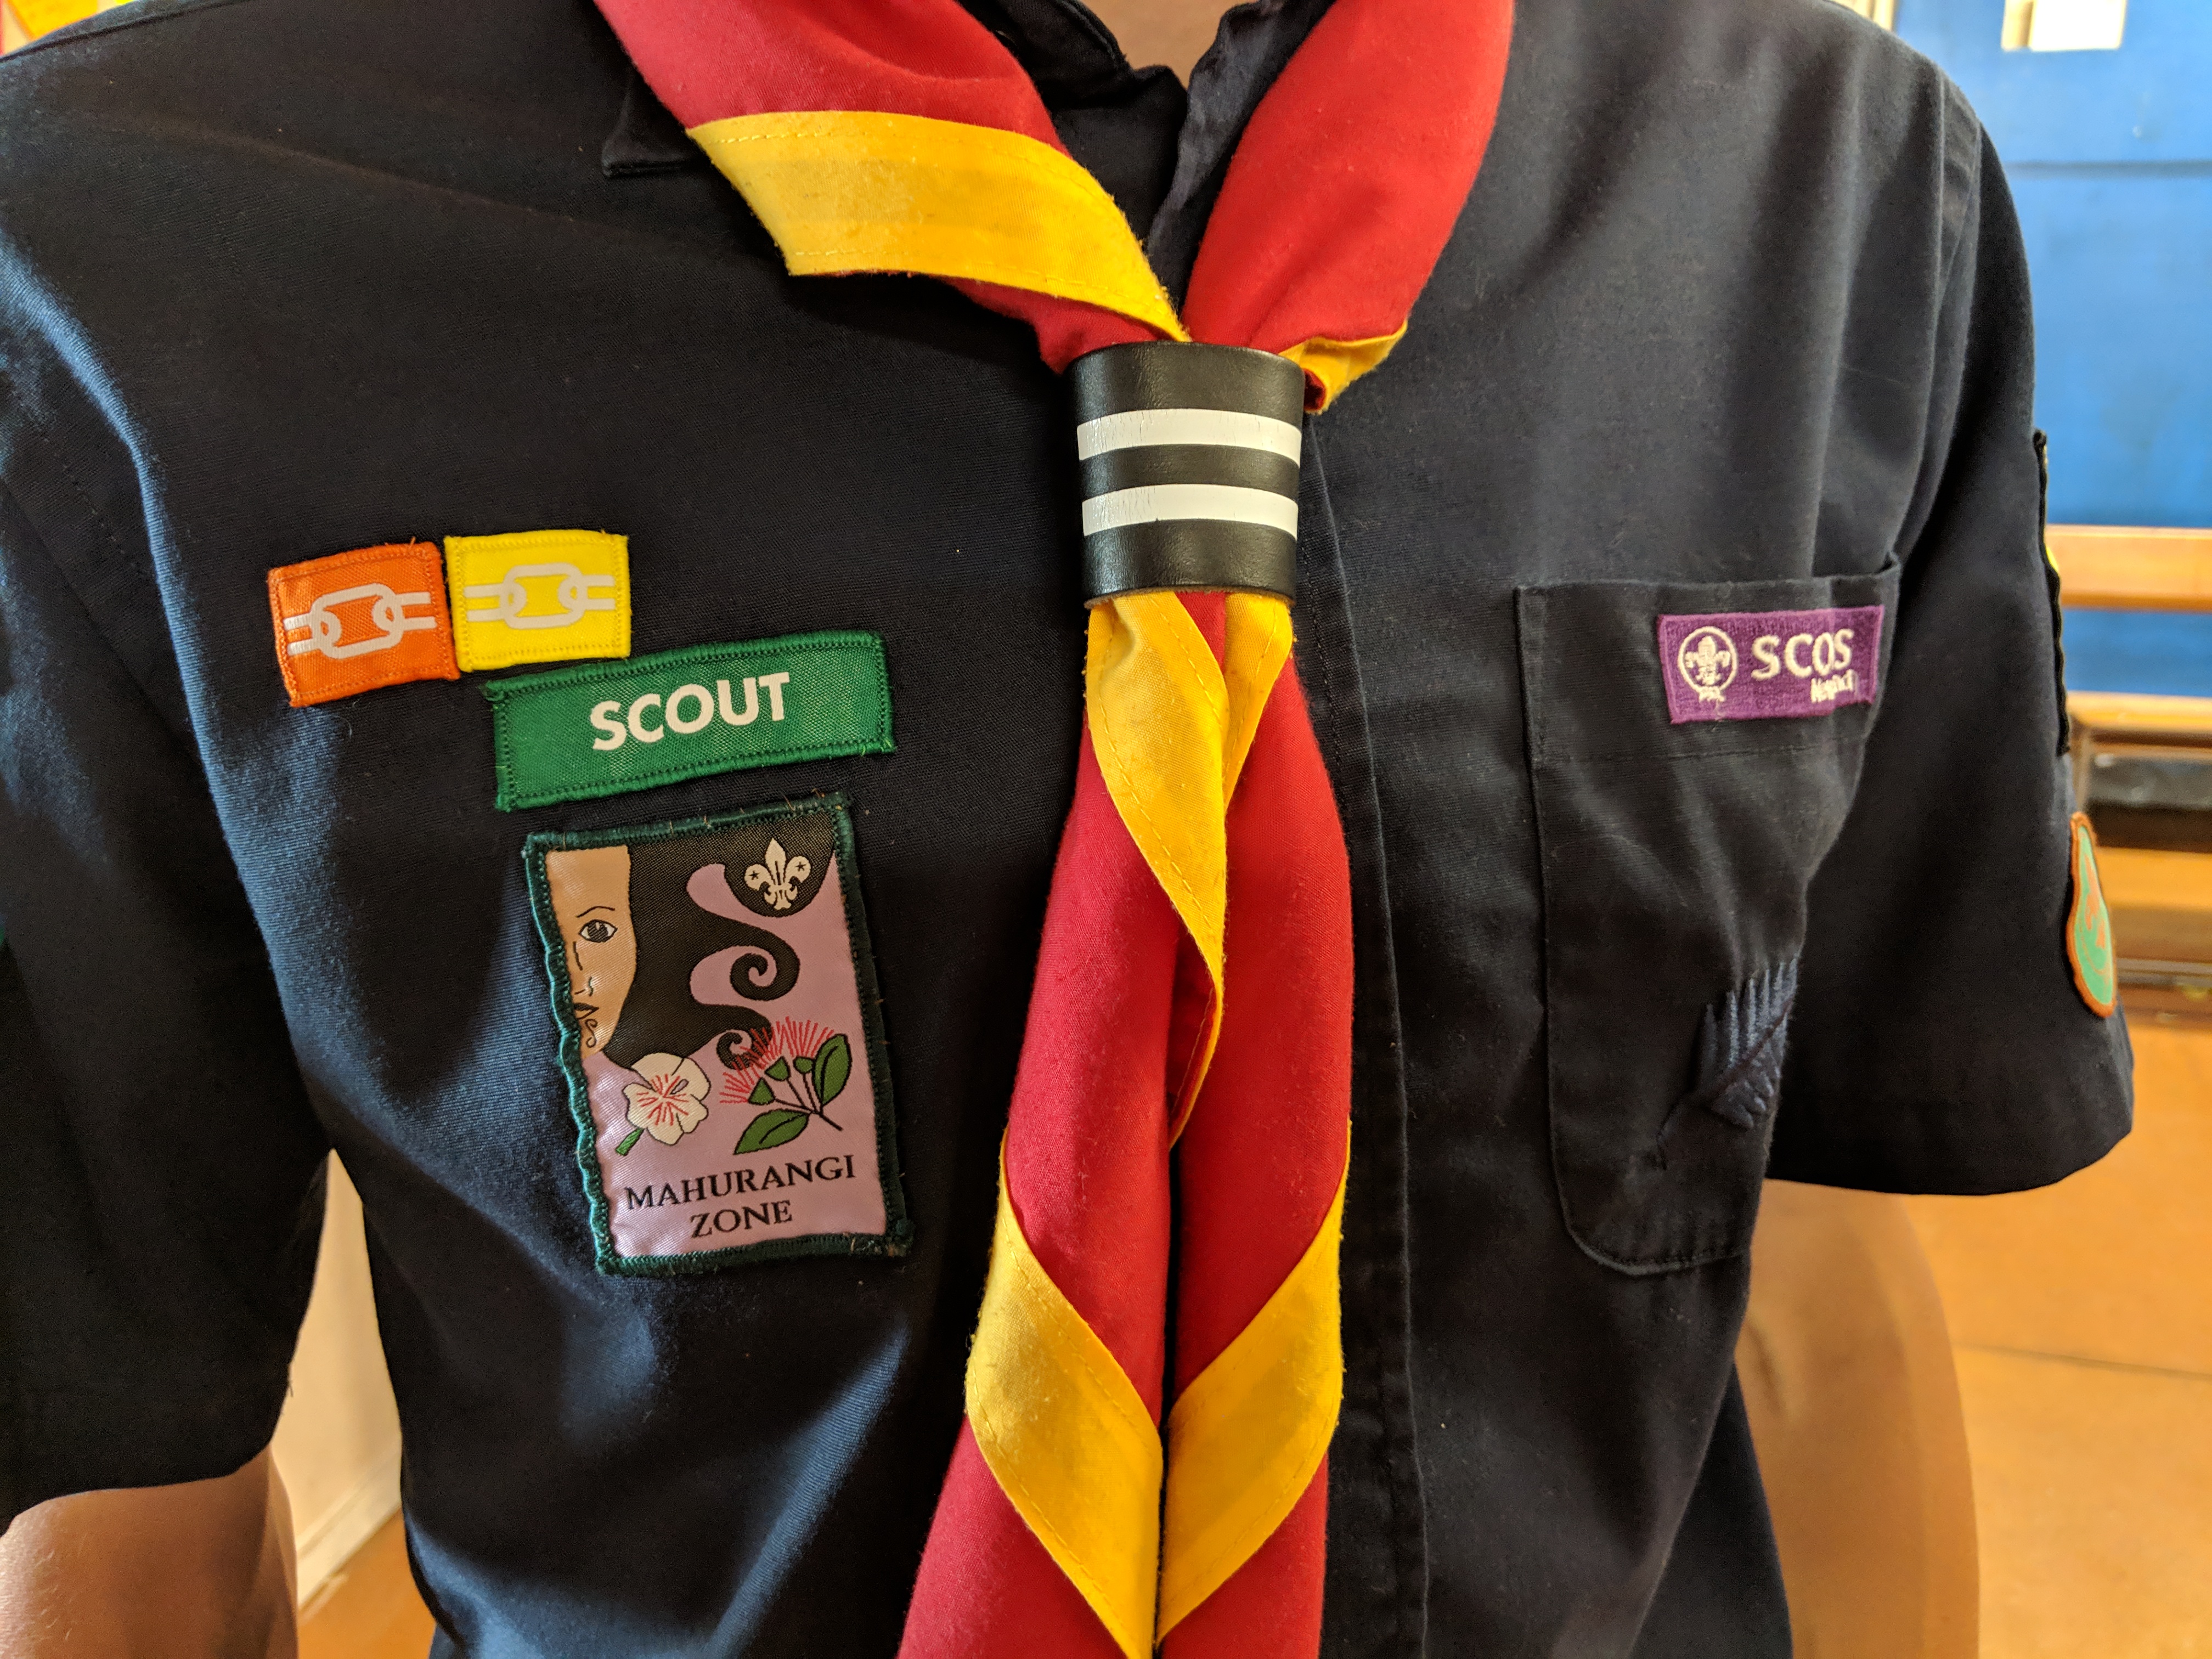
Front Chest Placement
The green Scout badge should mirror the purple Scout badge on the right. Kea and Cub link badges should be spaced systematically to leave room for future scout link and venturer link additions.
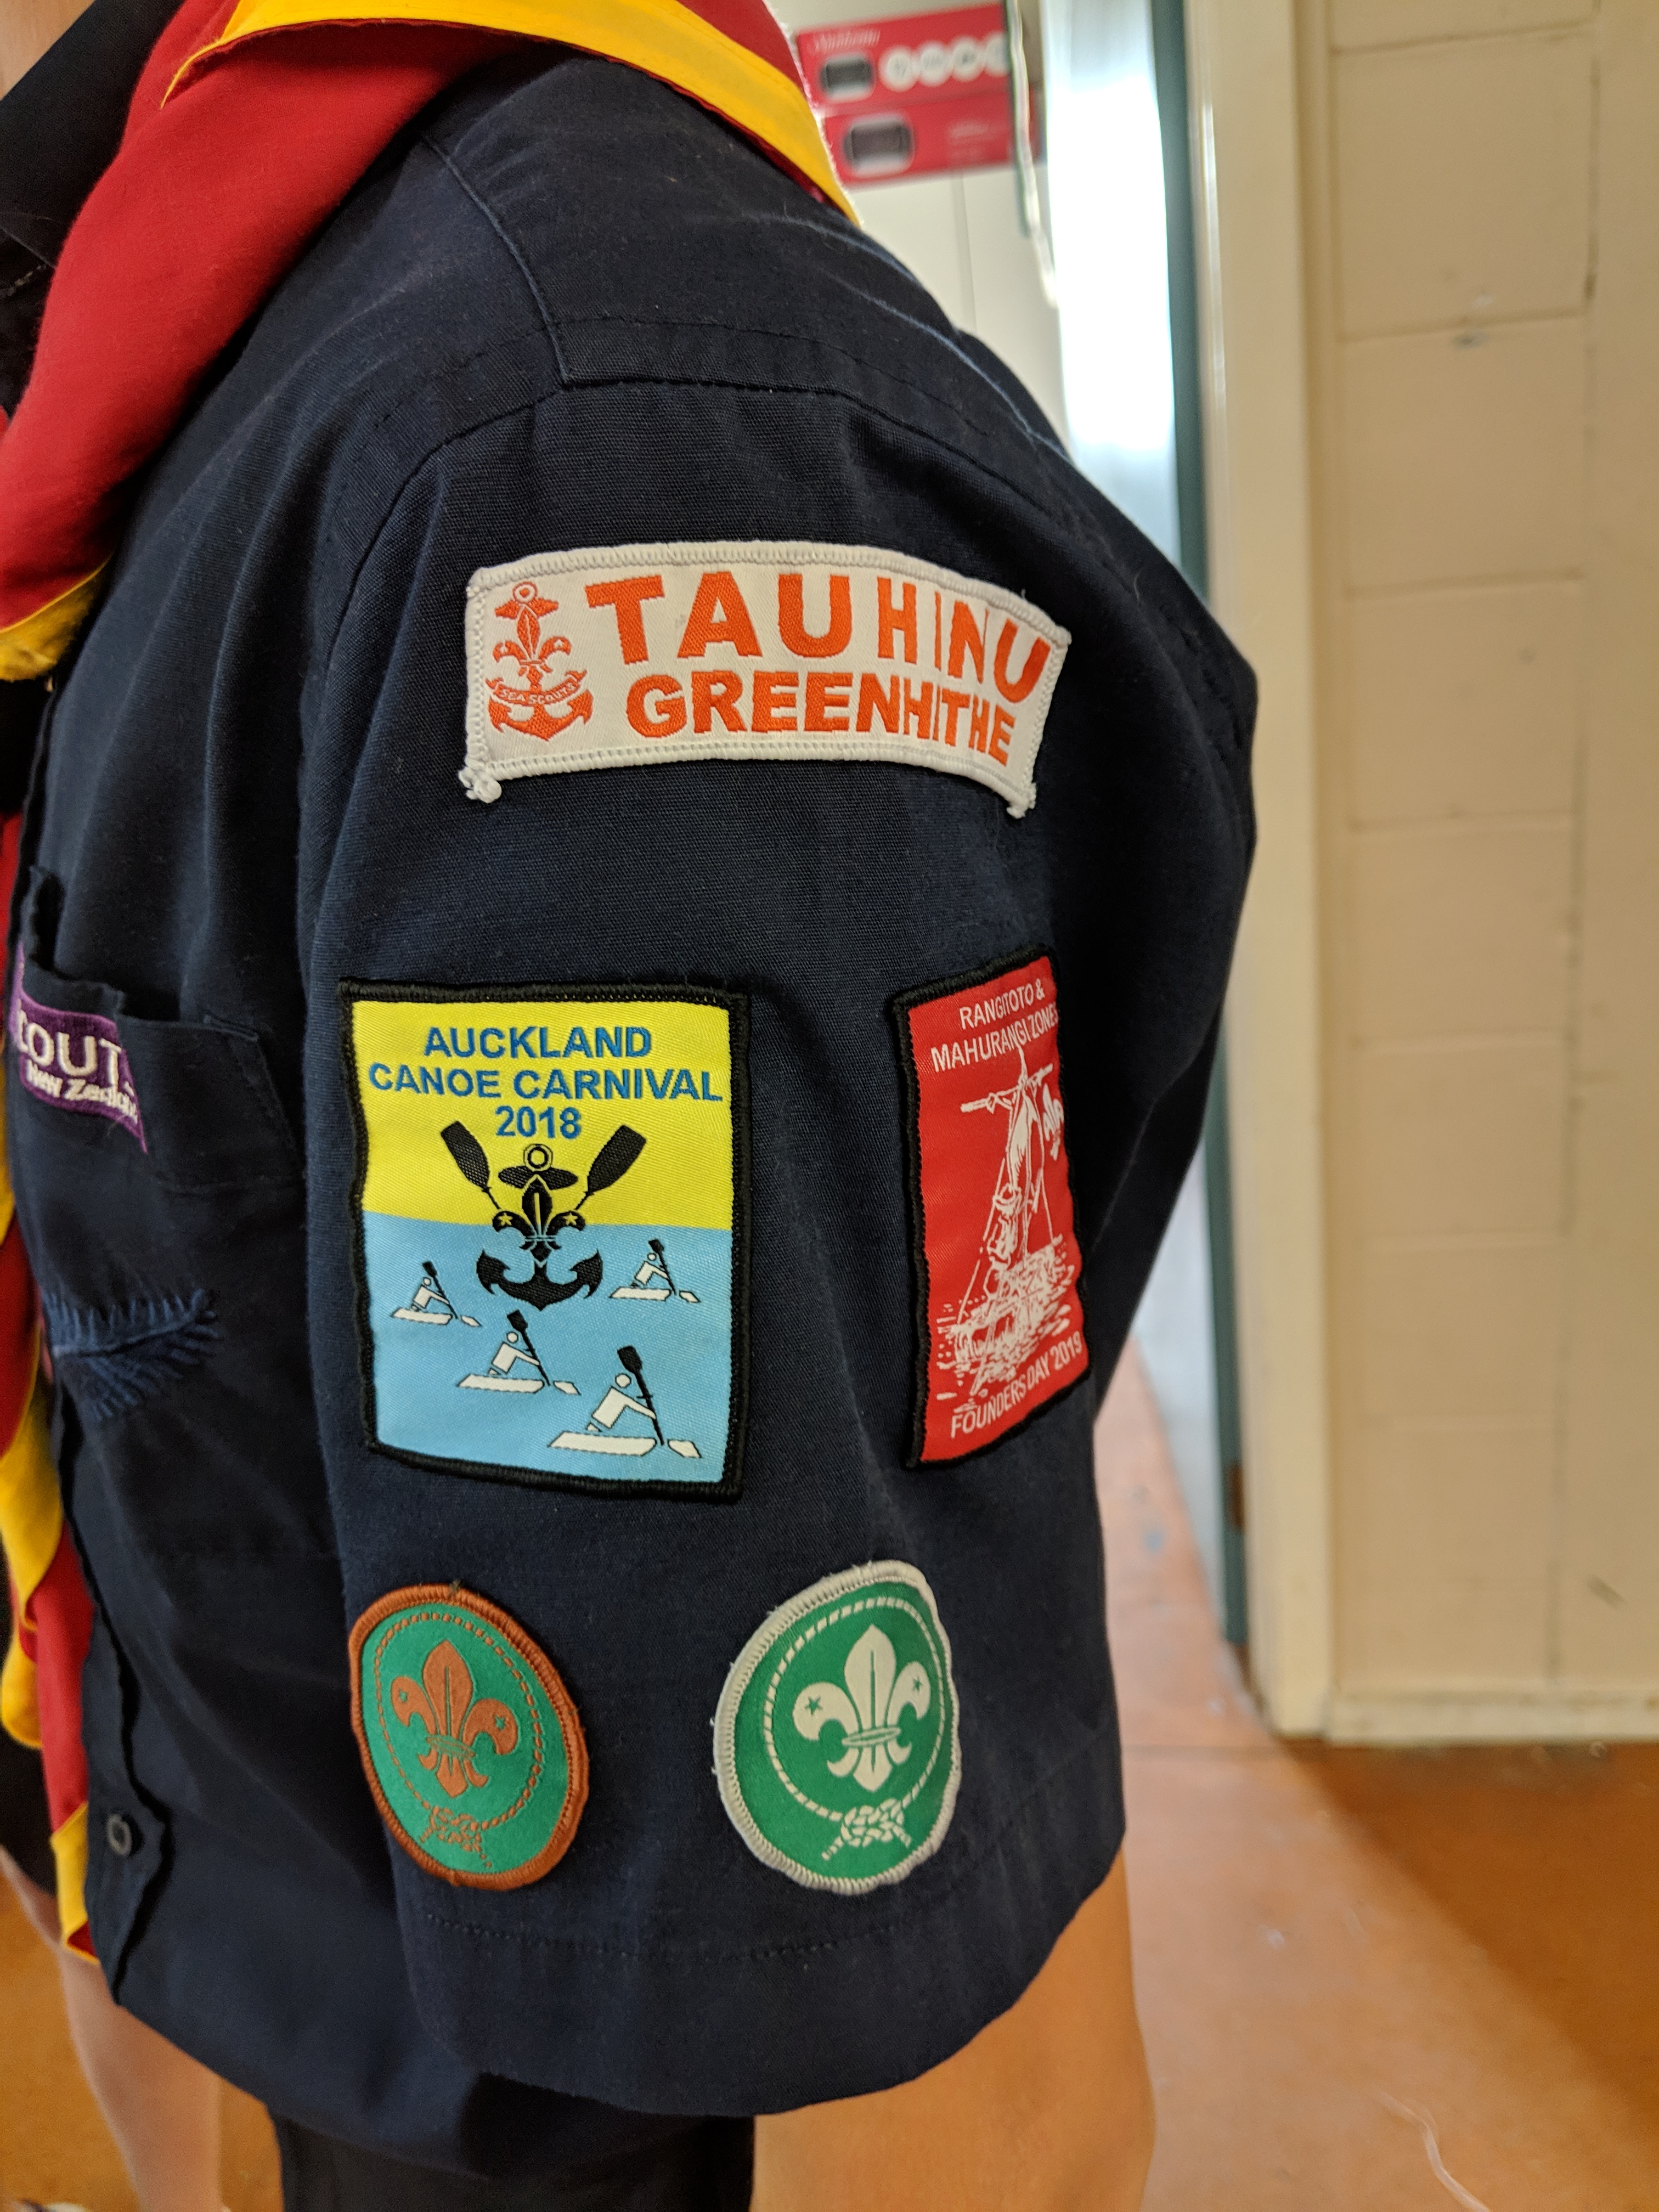
Left Sleeve Layout
The Tauhinu badge must sit exactly at the top of the sleeve (be aware that the shoulder seam isn’t always the center line). Up to two event badges (less than a year old) can be placed directly underneath. Bronze, Silver, and Gold awards are spaced across the bottom. Note: Until the Scout Bronze is achieved, your highest Cub award may remain here.
More placement references will be added as they become available.
🧵 How to Sew On Your Badges
⚙️ Method 1: Using a Sewing Machine
- Pin the badge into its correct position using at least two pins.
- Double check your spacing guidelines before sewing.
- Work straight from the top side of the shirt, stitching cleanly through the badge.
- Pro-Tip: Use clear nylon thread on the top spool. It is completely invisible, meaning you don’t have to switch thread colors for different badges!
- Travel a small amount at a time. Leave the needle down in the fabric and lift the presser foot to pivot around corners smoothly.
- When working on tight sleeves, turn the shirt inside out. This lets you sew directly on the badge inside the sleeve without having to stretch it around the machine arm.
🪡 Method 2: Hand Sewing
Always use a thread matching the embroidered border of the badge. If a color match isn’t available, clear/invisible nylon thread works perfectly.
- Secure the badge tightly into place with at least two straight pins.
- Verify alignment against your section uniform layout rules.
- Use small, neat overhand stitches directly through the outer border, catching just the edge of the badge fabric.
- Keep your length of thread no longer than your forearm; any longer increases the likelihood of tangling.
- Use a single thickness of thread rather than doubling it up to keep the stitches low profile.
- Consider using a thimble, as uniform badge backing materials can be quite rigid and tough to push through.